Raspberry Pi Zero Cluster
This article explains the way I built my own Raspberry Pi Zero Cluster, having them connected in ethernet device mode to a 3B+.
Granted, this is just for playing around with distributed processing.
From here on, the Raspberry Pi Zero is going to be called zero(s) and the Raspberry Pi 3B+ (or whatever other version you have) as master;
Configuring each zero
It is recomended to use Raspbian Lite for the raspberry pi zeros, since it's desirable to have as little overhead as possible.
Each of the zeros need to be configured in ethernet gadged mode; for that, the first thing to do is add the following configurations:
In the /boot/cmdline.txt file, just after rootwait add the following command:
modules-load=dwc2,g_ether
Next, at the bottom of the /boot/config.txt file, add:
dtoverlay=dwc2
Finally, to be able to connect to the zero using ssh, create an empty file named ssh in the boot path /boot; the following command should do the trick:
$ touch /boot/ssh
After the files have been configured correctly, the next step is to connecto the RPi Zero to a computer and access it using ssh
$ ssh pi@raspberrypi.local
When connected, a static ip address needs to be set, as well as a delay in the boot configuration (for reasons that will become clear later).
So, when connected to the zero, edit the /boot/config.txt file and add
# use 20, 30, 40 for each other raspberry
boot_delay=0
# the following will shave a little bit of the energy usage
dtparam=act_led_trigger=none
dtparam=act_led_activelow=on
Now on file /etc/rc.local, add the following line
# this command will disable HDMI, which will reduce energy usage
/usr/bin/tvservice -o

# exit 0 is the last line in that file
exit 0
It is very important to keep energy usage in check, since all the zeros will be connected using usb to the master, where power delivery is limited
Finally, configure the network.
Change the hostname in /etc/hostname
# z2, z3, or whatever name you see fit
z1
Update the hosts file `/etc/hosts'
...
127.0.0.1      z1
And finally, to set the static ip address, edit the /etc/dhcpcd.con file:
interface usb0
# use whatever address you like, but remember the submask as we'll need to add it to the master node
static ip_address=192.168.210.2/24
# this is the ip address that the master node
static routers=192.168.210.1
# and finally, since we might want the zero to access the internet,
# for updates or whatever, we add the CloudFlare DNS ip address
static domain_name_servers=1.1.1.1
Repeat this for all the zeros you want to configure, remember to give them all a different hostname, ip address and boot_delay.
Optional settings
If you are going to do some heavy compilations, you might want to change the amount of swap space available by modifying the /etc/dphys-swapfile file:
...
#Change this to any amount of MB you can spare for swap
CONF_SWAPSIZE=1024
...
The other setting is for Rust 1.42.0 compatibility; add the following flag to .profile:
export RUSTFLAGS='-Ccodegen-units=1'
This will fix some compile errors from happening.
Master configuration
Now on to configure the master node, a static ip addresses is going to be assigned to each zero; also package forwarding needs to be activated to allow sharing of internet access.
First the ips, open /etc/dchpcd.conf and add the following:
interface usb0
static ip_address=192.168.210.1/24

interface usb1
static ip_address=192.168.220.1/24

interface usb2
static ip_address=192.168.230.1/24

interface usb3
static ip_address=192.168.240.1/24
Knowing which number (usb#) each zero is going to be assigned, is hard to know beforehand; to help with that the boot_delay configuration was added. That will force the order they are detected by the master node and the ip addresses will be assigned correctly.
For internet sharing, a couple of steps need to be followed:
- First, enable ip forwarding
- Especify outbound interface
wlan0in this case - Enable forwarding on each zero interface
Create a file in whatever location you see fit, /home/pi/inet-share.sh is as good as any, and add the following content:
sysctl -w net.ipv4.ip_forward=1
iptables --table nat --append POSTROUTING --out-interface wlan0 -j MASQUERADE
iptables --append FORWARD --in-interface usb0 -j ACCEPT
iptables --append FORWARD --in-interface usb1 -j ACCEPT
iptables --append FORWARD --in-interface usb2 -j ACCEPT
iptables --append FORWARD --in-interface usb3 -j ACCEPT
# The following settings make eth0 be preferred over wlan0
ifmetric eth0 0
ifmetric wlan0 10
That script has to be executed everytime the master node boots, so add it to /etc/rc.local
...
sh /home/pi/inet-share.sh

exit 0
Final remarks
To connect to each zero, all that is needed is to ssh to their hostname or ip address from the master.
$ ssh z1.local
Next step would be to create a ssh key in master, and add it to each zero to no longer need to enter any passwords every time a connection is stablished. But that is up to you.
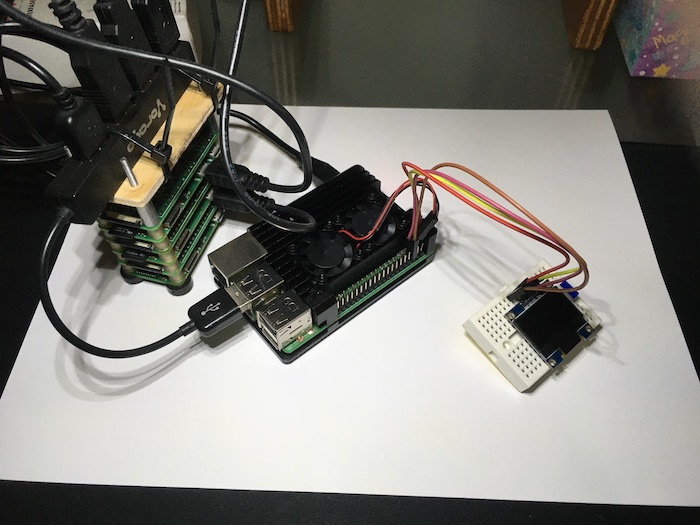
This is my current cluster configuration, ignore the small oled screen, thats for another project.
Enrique CR - 2020-02-29